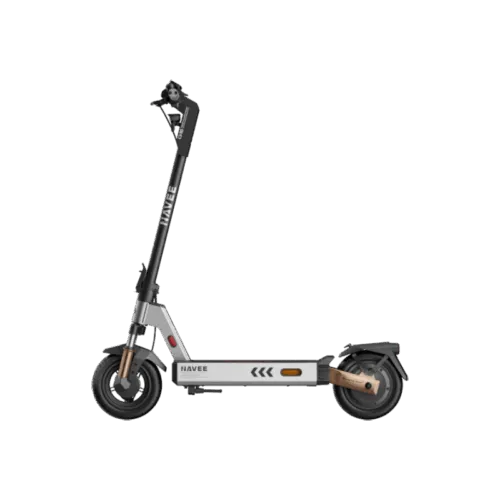
Shop official spare parts and watch repair videos


Solution
Solution
1.Battery Usage
1.1. Use the battery within an ambient temperature range of -10 to 40°C.
1.2. Keep the battery away from heat sources, open flames, and flammable or explosive materials during use or storage.
1.3. Avoid dropping or subjecting the battery to heavy impact.
2.Battery Charging
2.1. Charge the battery for no longer than 12 hours to prevent overcharging and reduce battery lifespan.
2.2. Charge the battery promptly when the level drops below 20% to avoid deep discharge, which shortens battery life.
2.3. Always use the official manufacturer’s charger.
2.4. When charging, park the scooter in a cool, ventilated place; avoid direct sunlight or high temperatures. If the scooter has been ridden in a hot environment, allow it to rest for 30 minutes before charging to let the battery surface cool.
2.5. Place the charger in a ventilated, dry area during charging. Ensure no objects cover the charger. If the charger indicator flashes red/green, does not light up, or the battery overheats, stop charging immediately. Once fully charged, disconnect the charger promptly to avoid prolonged connection.
3.Battery Storage
3.1. Store the scooter in a dry, well-ventilated area to prevent moisture or damage to the battery. For long-term storage, fully charge the battery and recharge every 60 days to prevent deep discharge.
4.Reduced Battery Range
4.1. Low tire pressure increases power output and reduces range. Regularly check tire pressure and maintain both front and rear tires within the recommended range.
4.2. Refer to the tire surface markings for recommended pressure values.
5.Battery Malfunction
5.1. If the scooter does not power on, try charging first. If it still does not charge, follow the battery troubleshooting guide for the specific model. Perform all operations in a legally safe environment with the power disconnected.
5.2. Frequent overcharge or deep discharge may reduce battery lifespan.
1.Tire Pressure Check
Frequency: Recommended once per month or whenever low pressure is suspected, and before riding if the scooter has been parked for more than 30 days.
Standard Range: 42–48 PSI (290–330 kPa)
Safety Range: 30–55 PSI (207–379 kPa)
Measurement Conditions: Tires cold (static ≥2 hours or ridden ≤3 km).
Tool: Pressure gauge (accuracy ≥ ±1 PSI).
2.Damage Inspection
Visual / Tactile Check: Inspect the tire for cracks, bulges, or foreign objects.
Minor Damage: Scratches less than 2 mm deep and shorter than 5 mm, with no cord exposure, can continue to be monitored. Keep observing tire condition.
Severe Damage: Scratches ≥2 mm deep, cracks >5 mm long, cord exposure, or bulges >10 mm in diameter—replace the tire.
Abnormal Pressure: Weekly pressure drop >15% and requiring repeated inflation—replace the tire.
3.Tread Depth Check
Threshold: ≤0.8 mm or aligned with wear indicators—replace the tire.
Tool: Depth gauge or visual inspection.
4.Cleaning and Maintenance
4.1. Regularly clean the tires to remove dirt, oil, or other debris.
4.2. Use mild cleaners and a soft cloth; avoid highly corrosive chemicals.
4.3. Remove stones, metal fragments, or other hard objects from the tire to prevent accelerated wear.
1.Hub Motor
1.1. Check whether the hub motor nuts securing it to the frame are loose. If loosened, apply thread locker and tighten to a torque of 65 ± 2 N·m.
1.2. Check the hub end cap screws for looseness. If loose, tighten them using a T25 Torx wrench.
1.3. With the power off, manually rotate the motor to check for any binding during free rotation. If significant resistance is detected, replace the hub motor immediately.
1.4. Inspect the hub motor for cracks or deformation, and check the motor wiring harness for damage or breakage. If cracks, deformation, or damaged/broken wires are found, replace the hub motor promptly.
Warning:
Damaged motor wires that are not addressed promptly may pose an electric shock risk.
2.Non-Motor Wheels
2.1. Check the wheel hub surface for cracks or deformation. Replace the hub if any damage is found.
2.2. Check the wheel fixing screws for looseness. If loose, apply red thread locker and retighten to a torque of 45 ± 1 N·m.
2.3. Manually rotate the wheel to ensure smooth movement. If binding occurs without foreign objects, replace the wheel hub promptly.
Warning:
Loose wheel fixing screws can cause wobbling or compromise riding safety.
1.Handlebar Check
1.1. Before riding, inspect all components on the headset assembly for damage. If any damage is found, replace the affected parts promptly.
1.2. Every 3 months or every 500 km, check the screws connecting the headset assembly to the stem. If any are loose, re-tighten them to a torque of 3 ± 0.5 N·m.
2.Folding Mechanism Check
2.1. Before riding, ensure the folding button and folding latch are properly engaged.
2.2. Confirm that the scooter is securely locked in place; check that the folding pin is seated in the designated slot.
2.3. Periodically inspect the folding area for any play or wobbling. If significant movement is detected, have the scooter checked at an authorized service center.
Warning:
Before riding, always check that the folding mechanism opens and closes normally and that there is no visible damage. Failure to secure the mechanism properly or wear and aging of parts may lead to safety risks while riding.